Are you longing to bring the pristine, majestic beauty of natural stone into your living space but are worried about its weight, high cost, and installation complexity? Installation of PU faux stone wall panels This is a groundbreaking architectural solution that is creating a sensation in the interior design community in 2026. With its superior advantages in weight and "surreal" beauty, this material is gradually replacing traditional tiling methods. In this article, Vieto Life We will guide you through the professional construction process to ensure the lasting beauty of your project for over 20 years.
Index
1. Why is installing PU faux stone wall panels becoming a trend?
The shift from natural stone to PU cladding is not just a passing trend, but a change in mindset in interior design towards sustainability and convenience.
1.1. Ultra-lightweight
Natural stone is extremely heavy, putting significant pressure on wall and foundation structures. In contrast, PU cladding panels, made from high-density polyurethane, are 10-20 times lighter than real stone. This allows for installation on lightweight partitions, drywall, or elevated areas without requiring elaborate reinforcement.
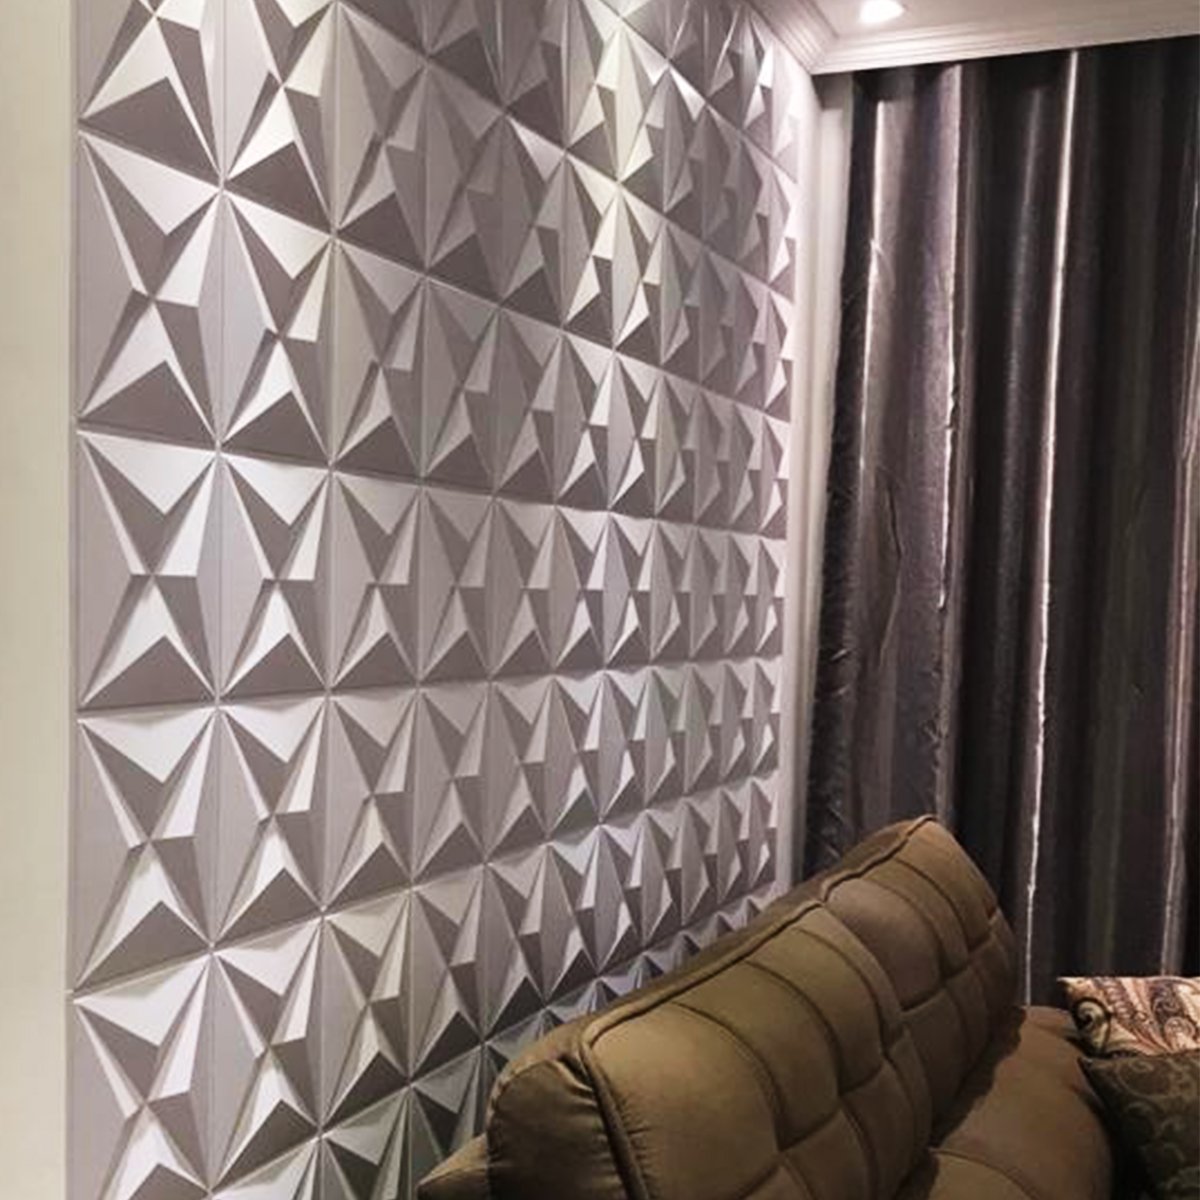
1.2. Surreal 3D Effects
Unlike conventional flat stone-patterned plastics, PU wall panels are molded from real stone using a 100% mold. Every rough detail, crack, and groove is realistically reproduced. When viewed from an angle or under light, the visual effect creates absolute spatial depth, making it difficult for viewers to distinguish between real stone and artificial material.
1.3. Versatile Applications
Thanks to its water-resistant, moisture-proof, heat-resistant properties and good elasticity, PU panels can handle any type of space: from luxurious living rooms and weather-resistant exterior facades to even vintage-style cafes.
2. Preparation before installing PU faux stone wall panels
To achieve the highest aesthetic quality for a project, thorough preparation is an indispensable step.
2.1. Inspect the surface of the reinforced concrete wall.
The base wall (the surface of your house walls) needs to be checked for excessive dampness or mold. Although PU panels are moisture-resistant, if the wall surface is too uneven (more than 2cm ups and downs), you need to smooth it out to ensure optimal adhesion of the adhesive.

2.2. Necessary construction tools
- Handheld cutting machine: Use a wood or metal cutting blade to cut the PU sheet.
- Glue gun: Use a specialized glue gun for industrial adhesives.
- Measuring instruments, laser pointers: To align the vertical and horizontal alignment of the rows of panels.
- Handheld drill: Used when screws need to be reinforced.
2.3. Selection of auxiliary materials
Don't underestimate the importance of auxiliary materials. Specialized adhesives (such as Xbond or other high-quality PU resin adhesives) and specialized putty in the same color as the stone are two crucial factors determining the durability and beauty of the joint.
3. Detailed installation process for PU faux stone wall panels from A to Z.
3.1. Step 1: Measure and determine the installation location
Use a laser level to determine the starting line (the reference point). This ensures the paneling doesn't shift when extending across large wall sections. Start from the bottom up and from a hidden corner toward a main corner.
3.2. Step 2: Cut the faux stone PU panel to size.
Thanks to its flexibility, PU panels are very easy to cut and shape. You can use a handheld cutting machine to trim the panel to the shape of your TV wall or corner. Make sure the edges are clean for the tightest possible joint.
3.3. Step 3: Apply glue and fix the panel to the wall.
Apply adhesive in a zigzag pattern or dots along the back of the panel. After applying the panel to the wall, press gently to distribute the adhesive evenly. If the wall is in a load-bearing position, use concealed screws in the gaps between the tiles on the panel for secure fastening.
3.4. Step 4: Handling joints and gaps
This is the "art" of Installation of PU faux stone wall panels. Use specialized putty that matches the color of the stone surface to fill in the gaps and screw heads. After the putty dries, use a small brush to apply the stone color over it to create a uniform color. The joint will then be completely invisible.
3.5. Step 5: Cleaning and final inspection
Once finished, use a damp cloth to wipe away any stone dust and excess glue. Perform a final surface smoothing check before handover.
4. Installation solutions for PU faux stone wall panels for different spaces.
4.1. Designing focal points in the living room (Sofa wall, TV wall)
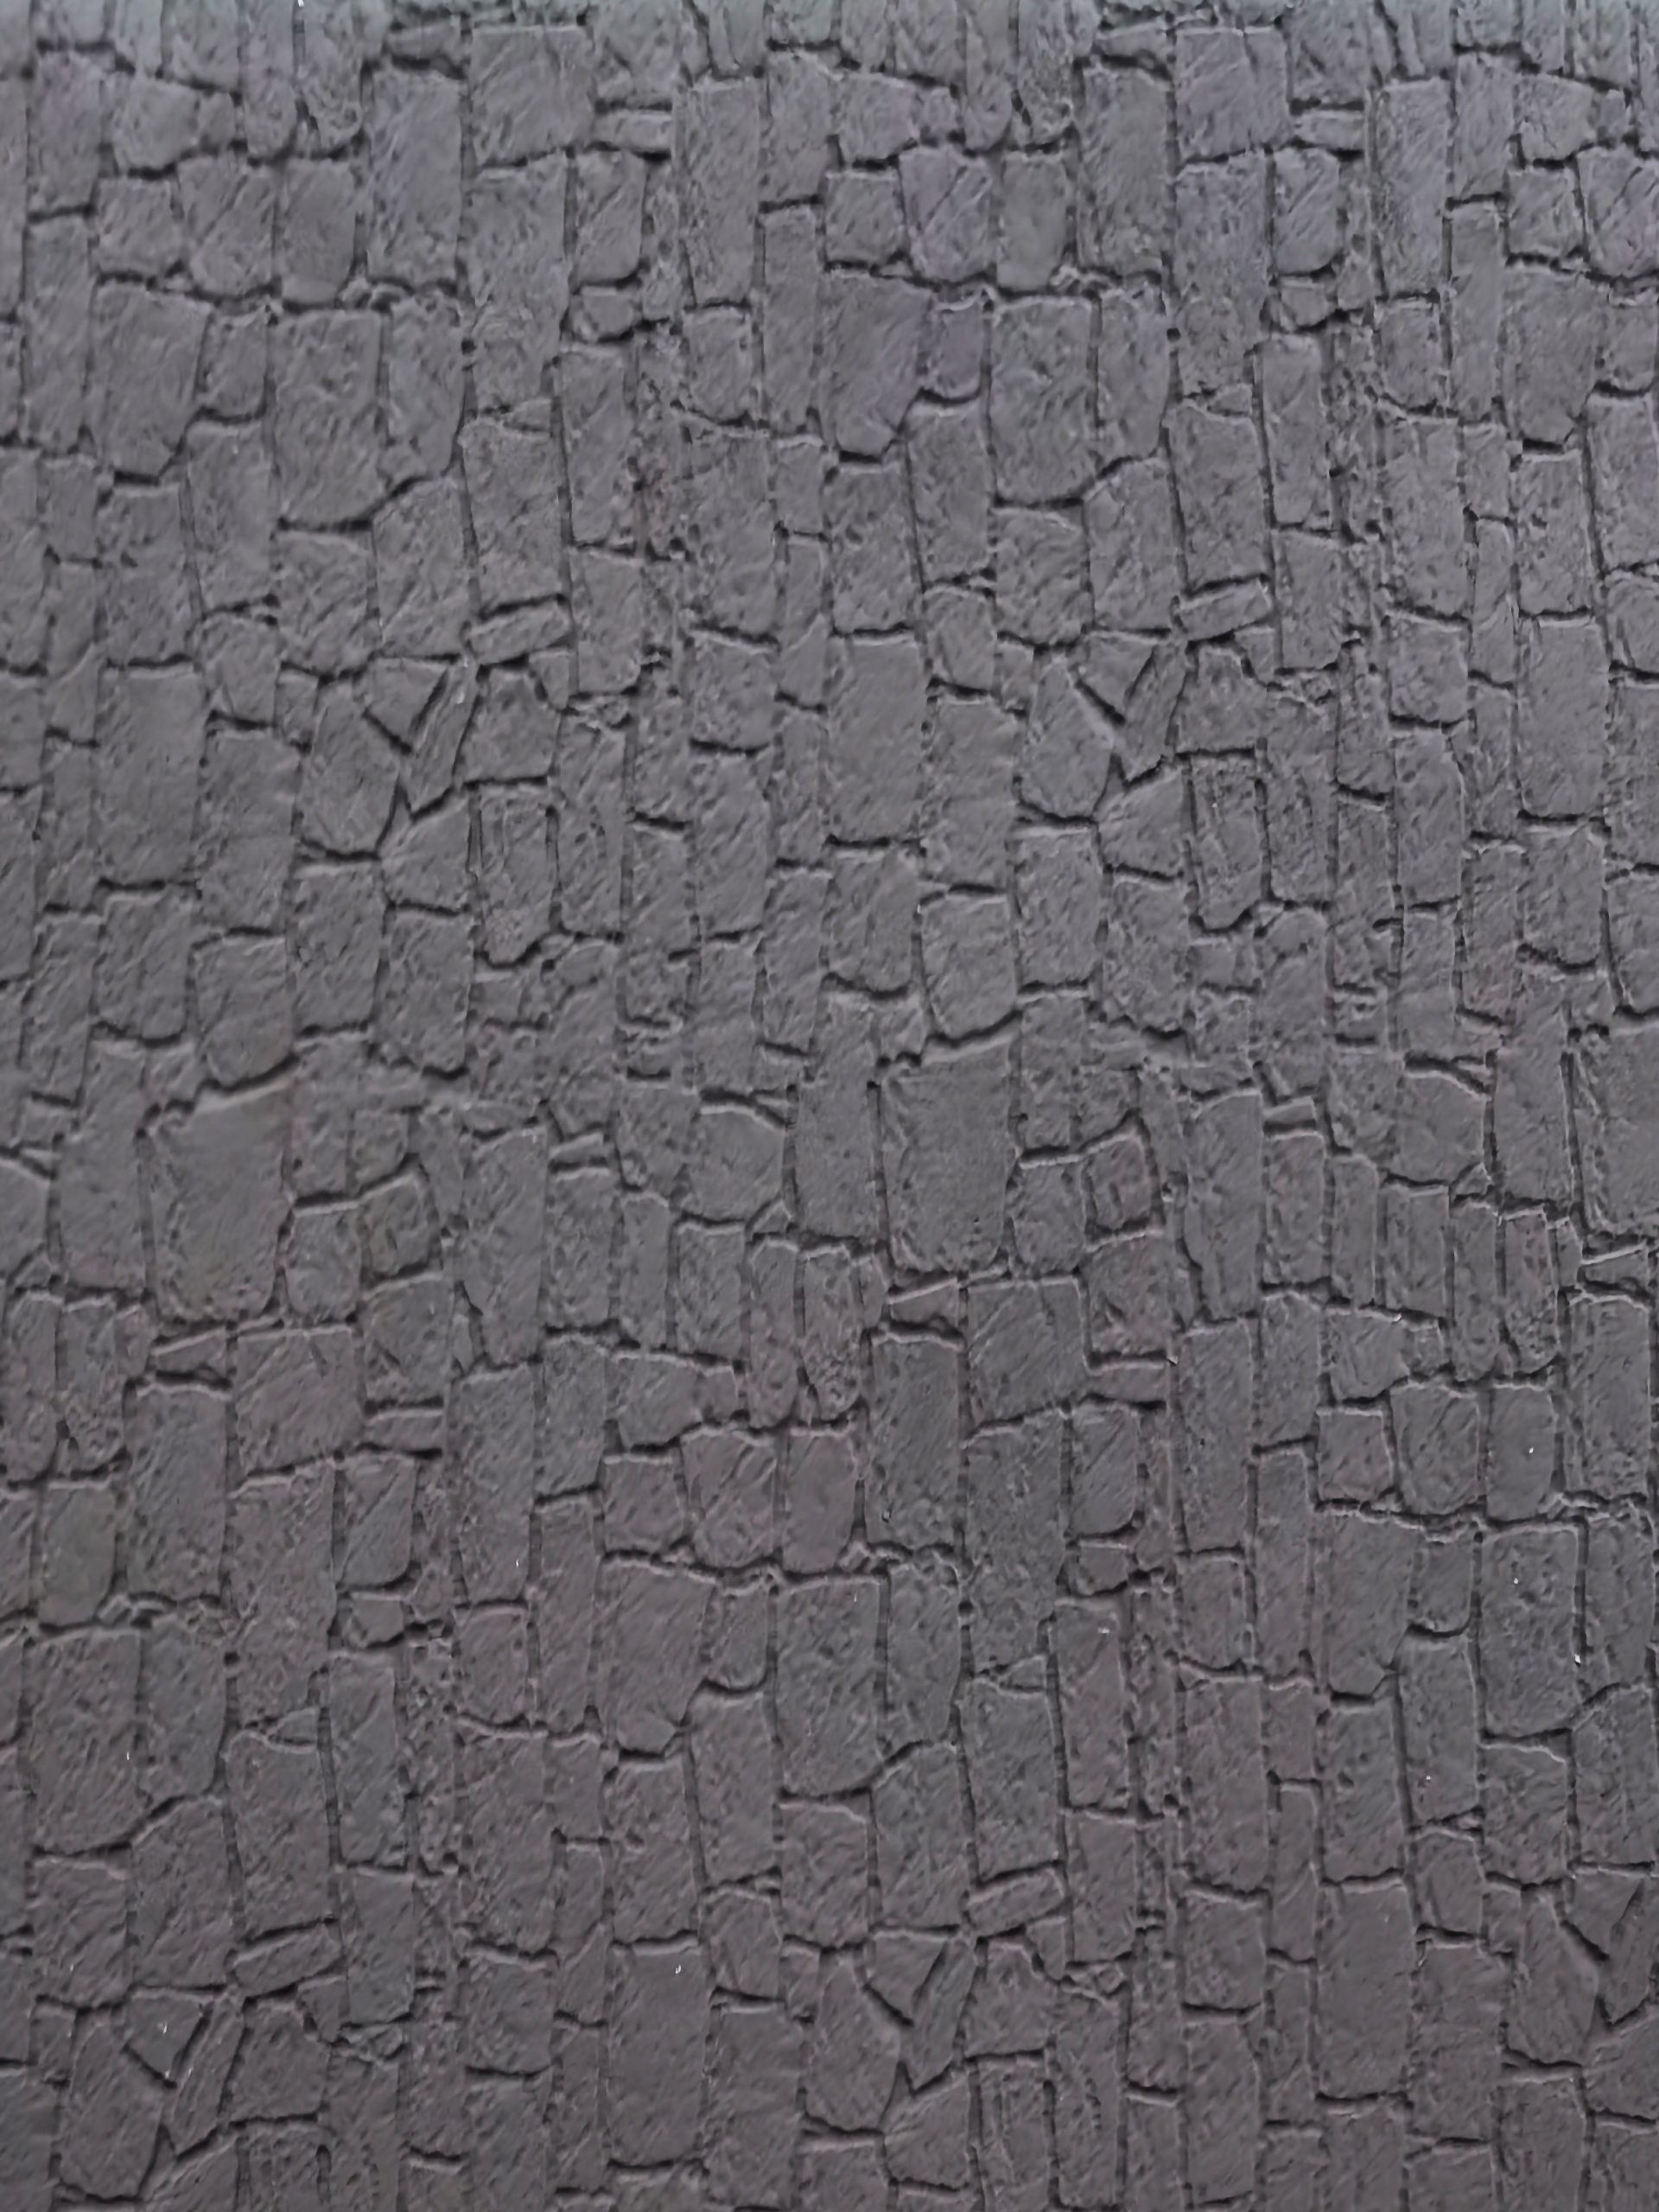
Use a type of stone with a high degree of roughness (such as honeycomb stone). Combine this with LED cove lighting. The light shining down will create shadows, highlighting the stone patterns and giving a luxurious feel, reminiscent of European stone villas.
4.2. Exterior and Facade Decoration
For exteriors, Vieco Life recommends applying an additional layer of specialized waterproofing to enhance weather resistance. Facade construction requires more precise screw fastening techniques to ensure safety against strong winds and storms.
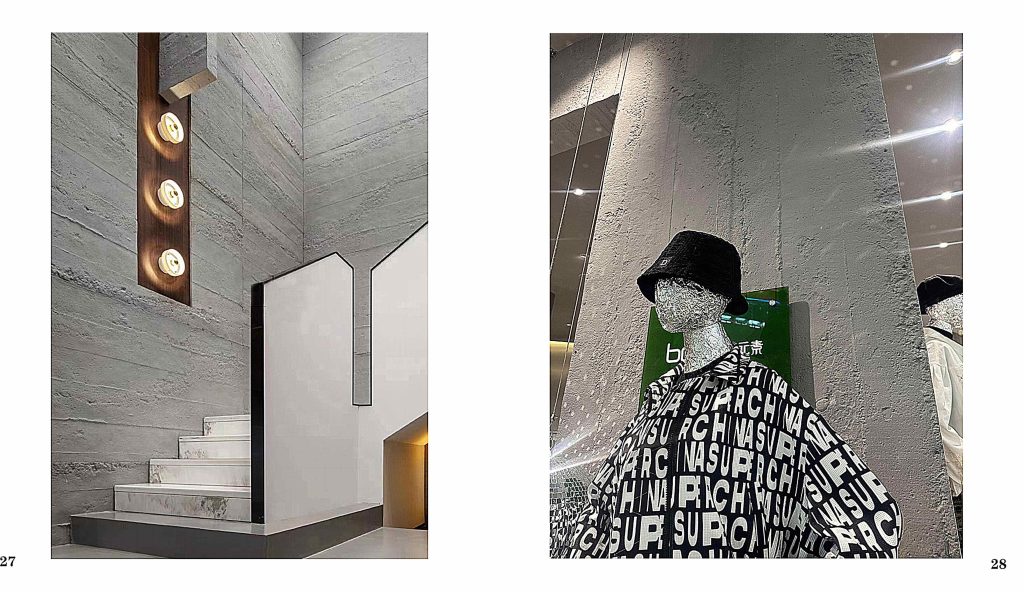
4.3. Construction for cafes, restaurants, and wine cellars.
This space needs to feel cozy. Choose PU panels with a faux stone finish in earthy yellow or ash gray tones. Covering an entire large wall will create a unique "boxed-in" effect, very attractive for customers to check in.
5. Key tips for installing durable and beautiful PU faux stone panels that last over 20 years.
To Installation of PU faux stone wall panels To reach your maximum lifespan, remember:
- Keyway jointing technique: If the product has a tongue-and-groove system, ensure the grooves are fully aligned. If the grooves are not properly fitted, the joints will be exposed and will accumulate dust over time.
- Choose a high-quality adhesive: Don't skimp on adhesive. Cheap adhesives become brittle with temperature changes, causing the panels to peel off after a few years.
- How to combine colors between the panels: Before installation, spread the slabs out on the floor to mix colors. Natural stone has random color variations; mixing different shades between slabs will create the most natural-looking wall, avoiding the "monotonous" look of artificially uniform colors.
6. Is installing PU faux stone panels really the optimal choice?
In the modern decorative materials segment, PU imitation stone panel Often mentioned for its lightweight nature, polyurethane (PU) is not necessarily the best choice in terms of durability and safety. It has poor heat resistance, easily deforms under high temperatures, and poses a fire hazard. Furthermore, the realistic appearance of stone patterns on a plastic base is often lacking, it is easily scratched, and its aesthetic appeal diminishes over time.
To bring lasting value and true class to the project, Viecolife soft stone cladding It is the perfect alternative thanks to its groundbreaking advantages:
-
Fire resistance level A1: This is the biggest difference that makes Viecolife soft stone far superior to conventional plastic or PU materials. Its heat resistance and fire resistance meet A1 standards, protecting buildings from fire risks and providing homeowners with absolute peace of mind.
-
Health and safety: The product is completely Formaldehyde-free, It emits no toxic gases, ensuring a healthy living environment and meeting green standards for high-end projects.
-
Ultra-lightweight and flexible: With its characteristic flexibility, soft stone can be bent to conform to any terrain (round columns, curved corners), making transportation and construction extremely simple and fast.
-
Cost-effective: Although soft stone offers a luxurious appearance comparable to natural stone, it comes at a higher price. low cost This offers significant advantages, from material costs to installation labor, helping investors optimize their budget effectively.
Share
KENMEC VIETNAM CO., LTD.
Group: 0374.955.566
E-mail: Salesvn@kenmec.com
Address: Thach That - Quoc Oai Industrial Zone, Tay Phuong Commune, Hanoi City